-


-
Out-of-Stock
-
Coup de
-
Fabriqué en
-
-
-
Fabriqué en
€17.00 -
The marbling technique consists in making a marbled pattern with the help of colours flotting at the surface of a liquid.
During this easy tutorial, we are going to use something almost everybody has in their fridge: milk! This liquid will let our waterbased Aquarellum inks float at the surface (they would be diluted in water).
You will need:
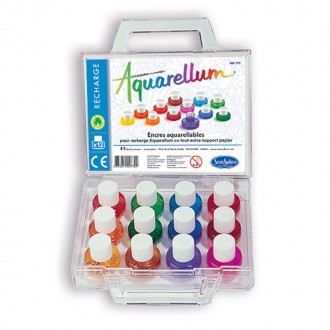
- Aquarellum inks
- 1 container
- A little bit of milk (Do not waste food, you do not need much milk)
- 1 stick
- Thick paper (watercolour type paper. If the paper is too thin, it might rip when it is wet).
- 1 pair of scissors
- Coloured crayons, a paint brush, anything you need to personalise your creations.

Step by step instructions:
- Draw and cut out different card shapes. Make sure that the shapes you create can fit in the container you will be using.
- You can have fun creating different kinds of shapes!
- Pour a little bit of milk in the container. You do not need a lot, it should just cover the entire bottom of the container.
- Use the pipette you can find in the different Aquarellum kits to drop ink drops on the milk. You can use different colours.
- Use the stick to mix the colours and create a pattern you like.
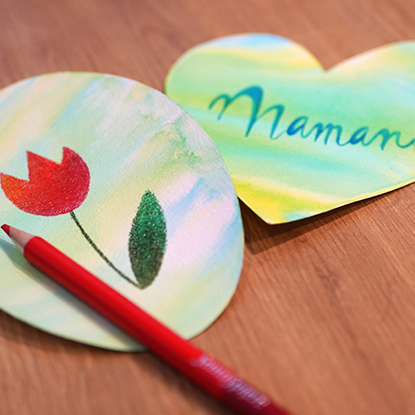
- When you are satisfied with the pattern, place one of your cards flat on the surface. Leave if for 5 seconds before removing it. You can decorate several cards with the same colour batch (as long as enough ink remains at the surface).
- Leave the cards to dry.
- Once the cards are dry, you can personalise them with coloured crayons, Aquarellum inks, stickers and even felt pens! Don't forget to write cute letters at the back ♥
Our special trick: you can dip only part of a card to get awesome modern patterns!
